
Why this helps
The source photo gives the system a real product to work from, while the Brand Guide shapes its surroundings. AI can still change product details, so visual comparison is part of the workflow.
Product Staging is an optional add-on enabled for selected workspaces. Confirm access and check the remaining daily staging allowance in Create.
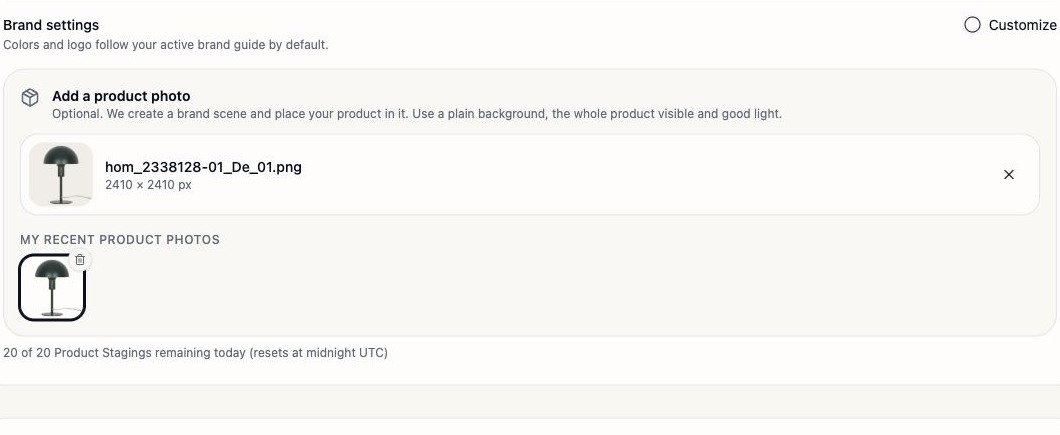
Choose a suitable product photo
Use a clear photo of one product with the entire object visible, a simple background and good light. Keep edges, important markings, materials and small parts easy to see. Avoid cropped products, strong glare and busy backgrounds.
The current product photo input accepts PNG, JPG or WebP, up to 10 MB. Use a source photo you are permitted to use.
Create and direct a placement
Add the product and describe its surroundings
In Create, upload the photo under Add a product photo or choose a recent one. Describe the environment and intended channel, then choose an aspect ratio. Keep the product’s real materials and identity clear in your brief.
Review the optimized brief
Select Auto-optimize prompt (strict conform). Check whether the expanded prompt changes your product’s material, colour or shape. Correct a conflict before staging. Brand styling should guide the scene without silently redefining the product.
Stage the product
Under Stage your product, select Stage product. The system creates a brand scene and places your product into it. Wait for each stage to complete; check the on-screen progress rather than repeatedly starting new jobs.
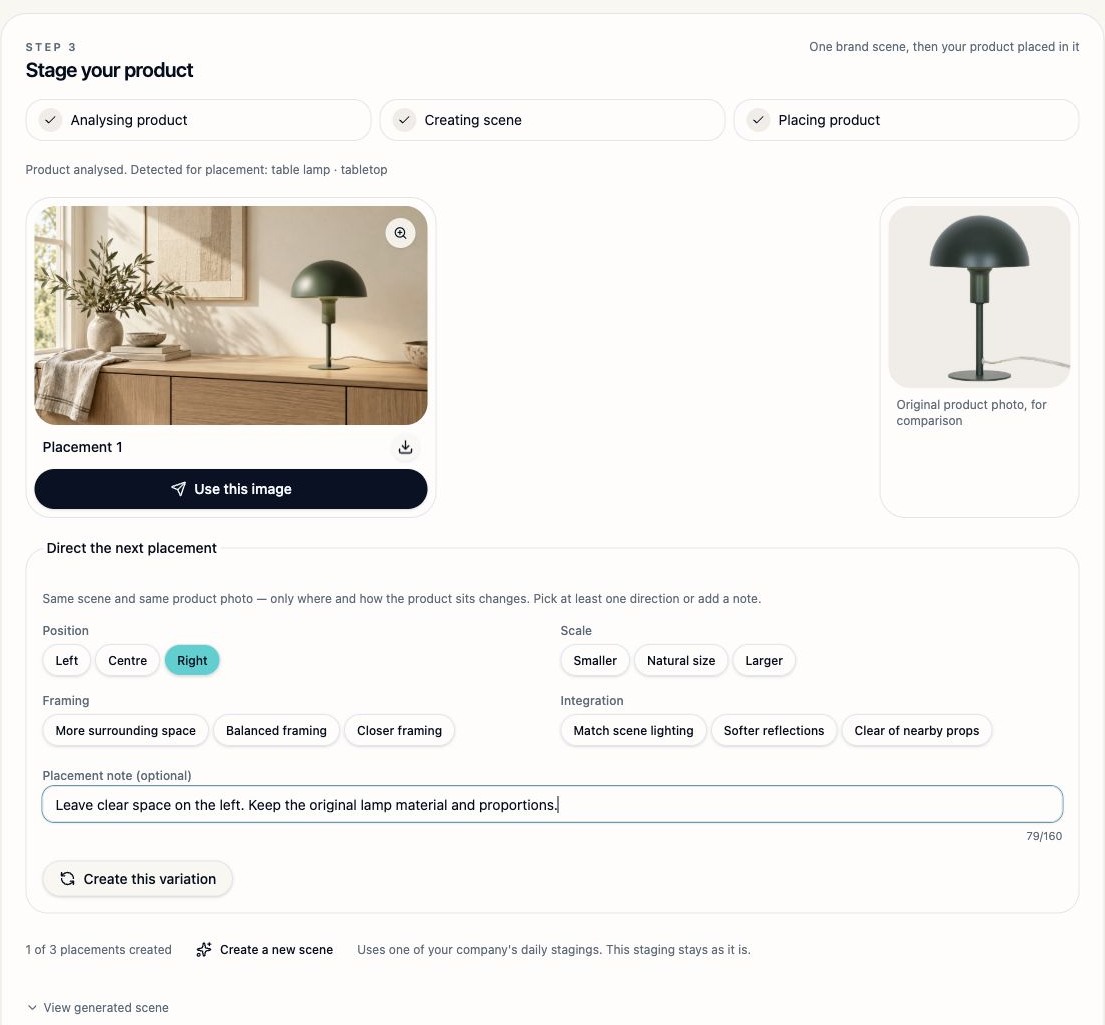
Review the generated scene and placement before choosing the image.Brand Asset test workspace · 5 November 2026 · select the image to enlarge. Refine the placement
Under Direct the next placement, choose Position (Left, Centre or Right), Scale (Smaller, Natural size or Larger), Framing, or Integration. Integration includes Match scene lighting, Softer reflections and Clear of nearby props. Choose at least one direction or enter a Placement note of up to 160 characters, then select Create this variation. Compare the results in the same scene and keep within the on-screen attempt limit.
Good to knowChanging the brief or product photo starts a new staging. Adjust placement within the current scene when the setting itself is already suitable.
Compare with the original and submit
Check the product’s silhouette, material, colour, proportions and small parts against the original. Check its contact with the surface and whether shadows look plausible. Select Use this image only when the result is suitable, then provide the campaign and usage context for your approver.
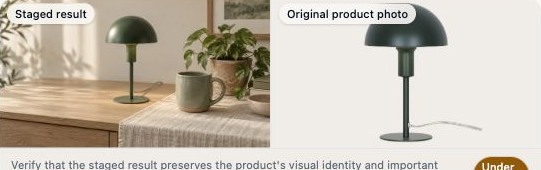
The original product photo gives reviewers a reference for product identity and important details.Brand Asset test workspace · 5 November 2026 · select the image to enlarge. Rule · review product fidelityProduct Staging is intended for lifestyle and campaign imagery. It is not a substitute for an exact packshot, and a passed automatic quality check does not replace human review.
Do’s and don’ts
| Do | Avoid |
|---|---|
| Show the whole product in the source photo. | Crop off handles, feet, cables or edges. |
| Check the product against the source after every attempt. | Assume a high score guarantees exact product fidelity. |
| Give one clear placement instruction at a time. | Change the source, brief and placement at once when diagnosing an issue. |
| Review available attempts and allowance. | Assume your workspace has unlimited placements. |
If staging needs attention
Why can’t I see Product Staging?
It is an optional add-on. Ask your Company Admin whether it is enabled for your workspace.
The product looks different.
Do not submit that placement. Check whether the expanded prompt changed the product description, then try a clearer photo or a more specific placement instruction.
The placement failed but the scene is usable.
Read the on-screen recovery action. Where the interface offers another placement in the existing scene, use that instead of rebuilding the entire staging.
How many placements can I make?
Use the limit displayed in your workspace. The guided pilot supports selectable placements, but the configured number of attempts and daily allowance can vary.