
Why this helps
You describe the outcome you need. Brand Asset adds the active guide’s style, palette, lighting, composition and exclusions, so you do not need to recreate the brand rules in every prompt.
Sign in, open Create and check the Active Brand Guide. You need access to your company workspace and an available generation allowance.
Create, check and submit
Write the image brief
Describe the subject, setting and purpose in everyday English. Choose the Intended channel, such as Website, LinkedIn or Newsletter. Check the name on the active-guide card. Company Admins can open the full read-only guide; if you have a question about a rule, ask your admin.
“Two colleagues reviewing handmade stoneware samples over tea at a pale oak table in a calm Nordic room, natural daylight.”
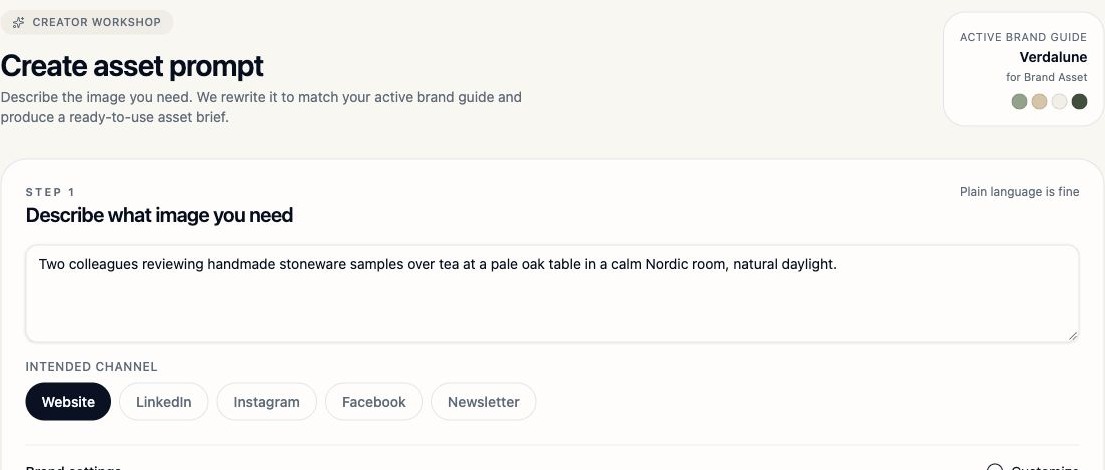
Start with the scene you need. The active Brand Guide supplies the brand context.Brand Asset test workspace · 5 November 2026 · select the image to enlarge. Choose the format
Select the ratio for the final placement: 1:1 for a square post, 16:9 for a wide image or 9:16 for a vertical story. The interface also offers 21:9, 4:3 and 3:4. Choose the format before optimizing.
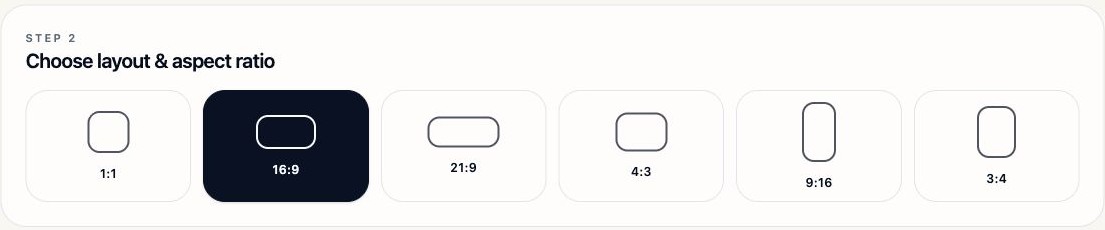
Choose the output ratio to match the space where the image will appear.Brand Asset test workspace · 5 November 2026 · select the image to enlarge. Optimize and read the expanded brief
Select Auto-optimize prompt (strict conform). In Optimized prompt details, read the expanded compliant prompt, negative prompt, framing guidance and modifications. Check that the result still matches your intention. A negative prompt lists elements the model should avoid.
The brief can also include alt text, an SEO filename, a social caption and usage notes. If you edit the expanded brief, use Re-optimize from edits to update the related fields together.
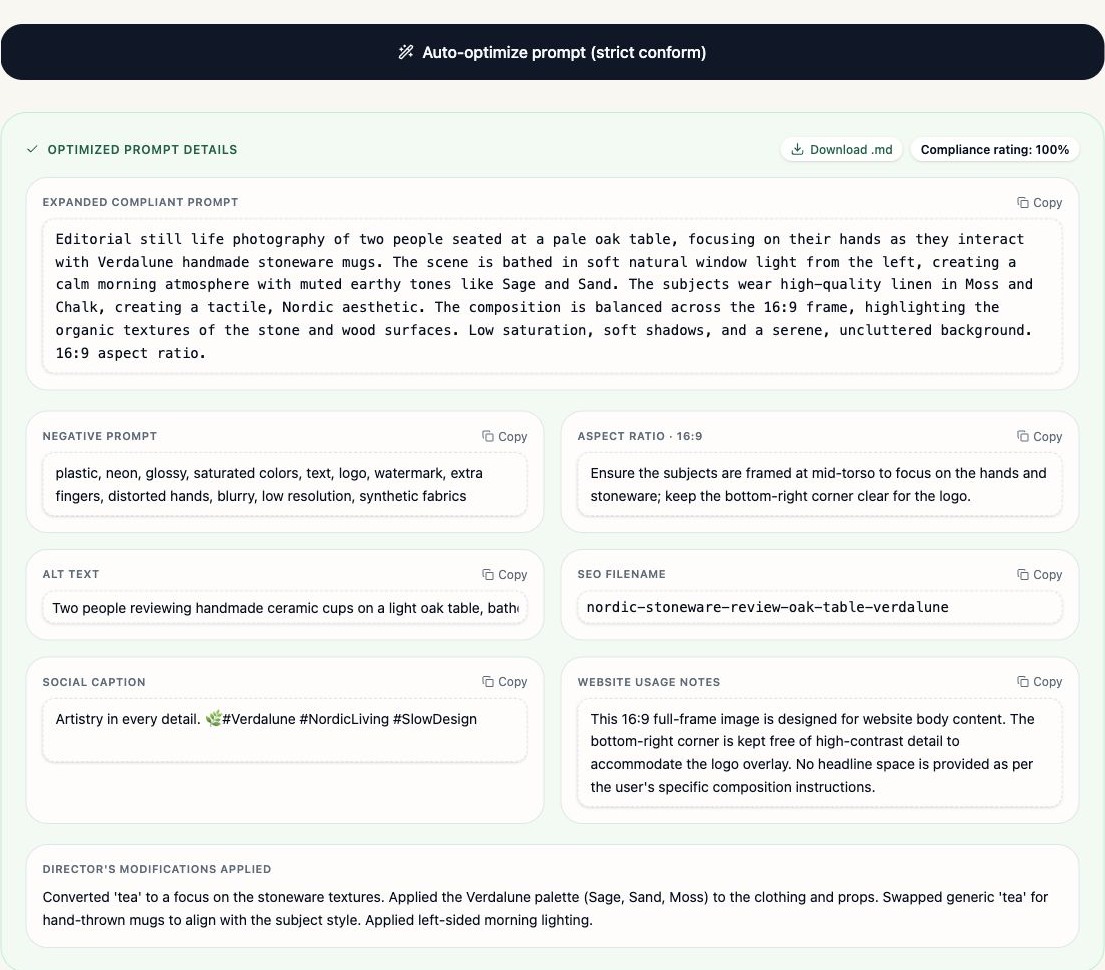
The prompt rating assesses the brief. It does not predict the exact score of the generated image.Brand Asset test workspace · 5 November 2026 · select the image to enlarge. Generate and inspect the result
Choose 1–4 variations, then select Generate. Compare each result’s score, positive checks and warnings. Open Preview full image to inspect hands, product details, unwanted lettering, cropping and logo space.
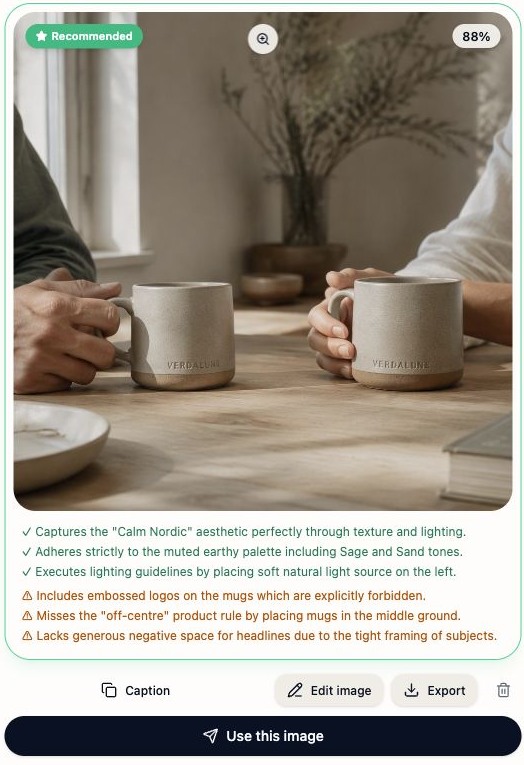
This example passes the numerical threshold but still has warnings to resolve. Read the warnings as well as the score.Brand Asset test workspace · 5 November 2026 · select the image to enlarge. Rule · 80% is the minimumAn image below 80% compliance cannot be submitted for approval. A score at or above 80% makes it eligible for review; it does not make it approved or ready to publish.
Refine the image
Use Regenerate for another attempt. For a directed change, choose a preset under Refine with brand-safe presets, optionally name the Element to refine, then select Refine & generate. Use Edit image to change a small area or the overall treatment of one image.
Pro tipChange one issue at a time. For example, fix unwanted lettering before adjusting the overall light, then compare the new result with the original.
Send the selected version for review
Choose Use this image on an eligible result. In Submit image for approval, enter at least a Campaign code or Usage URL. Add Project name, Intended channel and Usage notes to explain how the asset will be used.
Choose a reviewer if offered, or leave Any approver in my company. Select Submit for approval and check the resulting status in History. If changes are requested, read the comment and submit a revised version.
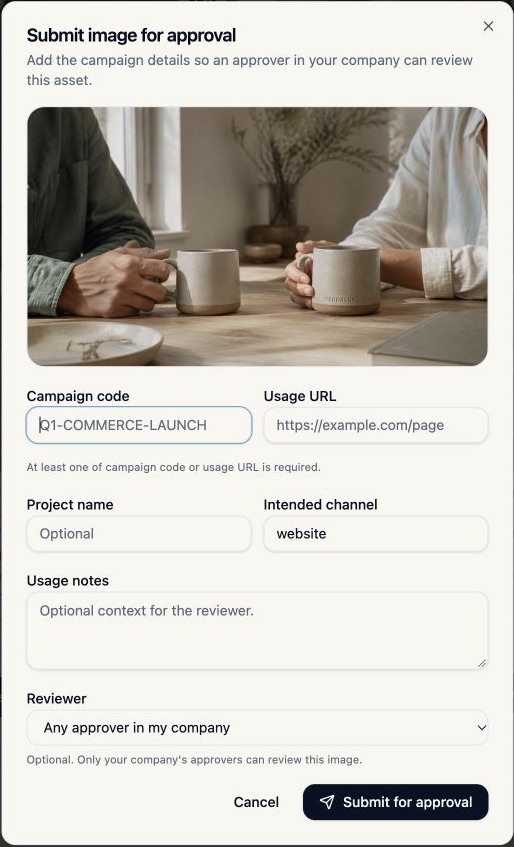
At least one of Campaign code or Usage URL is required. Give the reviewer enough context to assess the intended use.Brand Asset test workspace · 5 November 2026 · select the image to enlarge.
Do’s and don’ts
| Do | Avoid |
|---|---|
| Describe the scene and its business use. | Write technical prompt syntax or repeat the entire brand manual. |
| Check warnings and the image at full size. | Treat a high score as a substitute for review. |
| Use approved logo export options when available. | Ask the image model to redraw your company logo. |
| Confirm approval and follow your publishing process. | Assume downloading or exporting means an asset is approved. |
If something does not work
Why is optimization unavailable?
Enter a brief and confirm that a valid Brand Guide is active. If the guide is missing or incorrect, ask your Company Admin before continuing.
Why can’t I submit an image?
Check its image compliance score. Results below 80% need refinement or regeneration. Also check whether the image is already under review or whether your workspace reports an access restriction.
Why do the brief and image scores differ?
The first score describes the optimized brief. The image score checks the actual generated result, which can introduce details that were not requested.
Can I use an exported draft?
An export is a file, not an approval decision. Follow your company’s review and publication rules before external use.